
Wooden clothespins
Alligator clips or hair clips of your choice
Thread - preferbly coordinating so it blends in.
Glue gun
So you take your ribbon and use a clothespin to fasten it around the dowel at one end. Wrap the dowel with the length of the ribbon keeping it close together to get the tighter curl and then securing the end with another clothespin. By the way, don't use plastic clothespin...I assume you would know that, but just in case, they melt when hot.
After you wrapped all the dowels, you stick them in the oven at 250 degrees for 30 minutes. Check them so the ribbon doesn't burn. I had no problems, but ovens do vary.

I stuck mine on a cookie sheet to bake. After they are done, let them cool down. Once cool, unravel them and they stay curly.

Take a ruler and cut the curly ribbon into a determined size. I started with 2.5 inches. Make sure that once you determine the size that you cut them all the same unless you are looking for more of a crazy bow. 
I used about 24 sections for the above bow. After cutting them all, you have to heat seal the ends so they won't fray.
You can use an Aim n' Flame or a match to heat seal the ribbon, just let the heat get to the ends and they start to melt. You don't want to singe them, but hey it happens. I actually lit a candle to do it and it was monotonous. There is a spray you can get to stop the fraying, but I don't have it, and didn't want to have to run out. But I think I will try it someday. This was the worst step in the whole project cause it was time consuming.
After heat sealing all the ends of the ribbon, I used a enlongated dish I have to stack them up putting thread down first so I could tug the ends to tie them together. So after the stacking, I just tied a knot in the thread and there you have your korker bow.
You take this bow and attach it to your alligator clip or other hair accesory with hot glue. I also lined my alligator clip with ribbon just to make it a little nicer, but I don't think you have to do this
My daughter is only 2, and after making the hairbow with the 2.5 inch pieces, I realized it was a little bigger than what I was looking to make. I think it will be good for a ponytail when she is older, but I was looking for something smaller so she could wear one on each side of her head.

So the next one I made, I cut the curly ribbon in 2 inch sections. It made a nice smaller bow, exactly what I wanted.

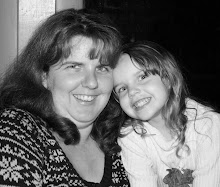
I'll post some pics of my daughter wearing them whenever I get a chance to track her down....


2 comments:
So cute! Cant wait to see Ally's pic when she is wearing them.
ohmygosh, Ally looked so cute with these in on Thursday!! And then she decided she didn't want them in of course. Hahaha. And then Fred made fun of me cuz I thought there was only one sitting on the table. How was I supposed to know you guys had clipped them together?? lol
Post a Comment